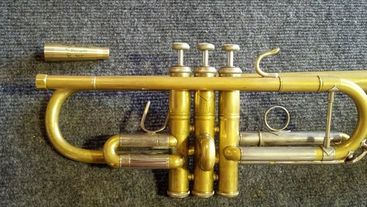
 Installing the Adjustable Gap Receiver yourself is a possibility if you have a few hours and some basic tools. Most installations require 3 to 4 hours by a novice and around 2 hours for experienced technicians with access to a repair shop. Of course, these times will vary based on your experience soldering, sanding and finishing, but I usually install an AGR in an hour and the rest is clean up time. My demonstration trumpet is a Bach C 229 that received a Malone conversion years ago. A local Denver player brought this horn in for the AGR Retrofit to increase efficiency and improve the upper register. The AGR gives you full control over air flow, flexibility, slotting and impedance allowing you to fine tune your horn and mouthpiece configuration far beyond what is possible with any other method. After the AGR installation, I personally found this Bach to play incredibly easier in all registers, but especially in the zone from G above the to high E. Wide interval leaps are now much easier and attacks are much more clean and centered. I welcome your feedback as you install your own AGR and fine tune your setup. Please leave a comment if you have any questions with the following instructions and I'll be happy to edit this tutorial. Thanks again for trusting me with your brass playing innovations and have fun with this project!
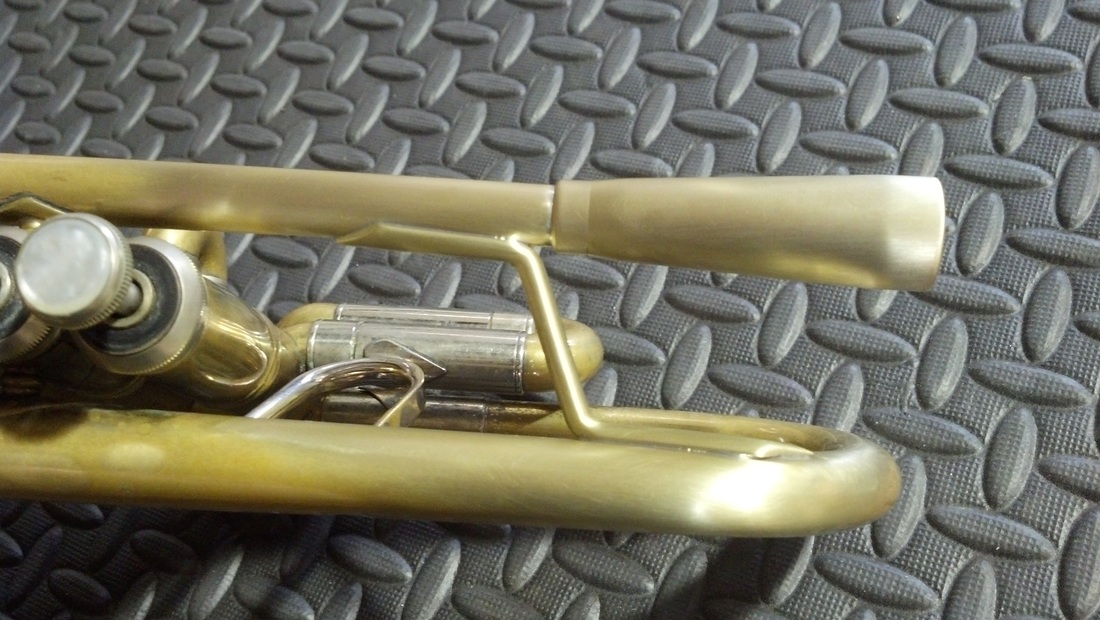
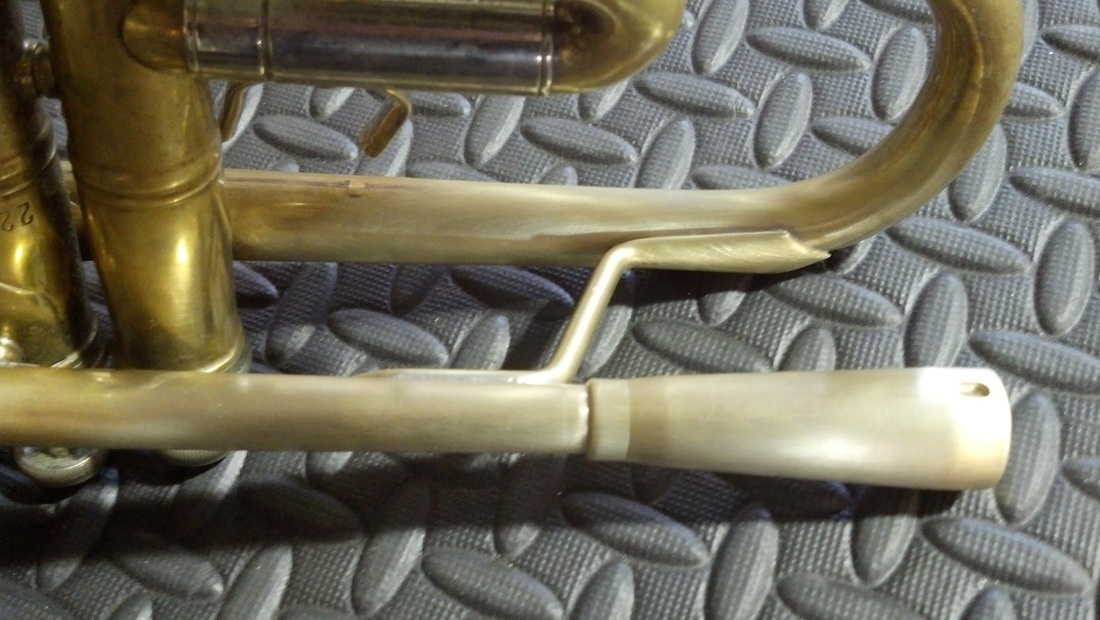
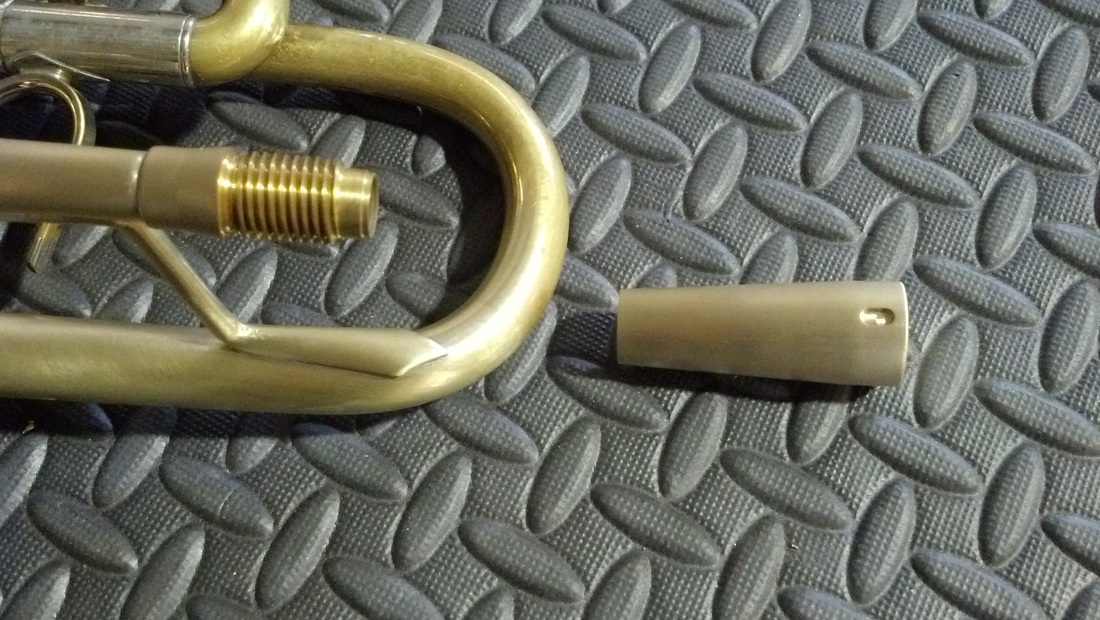
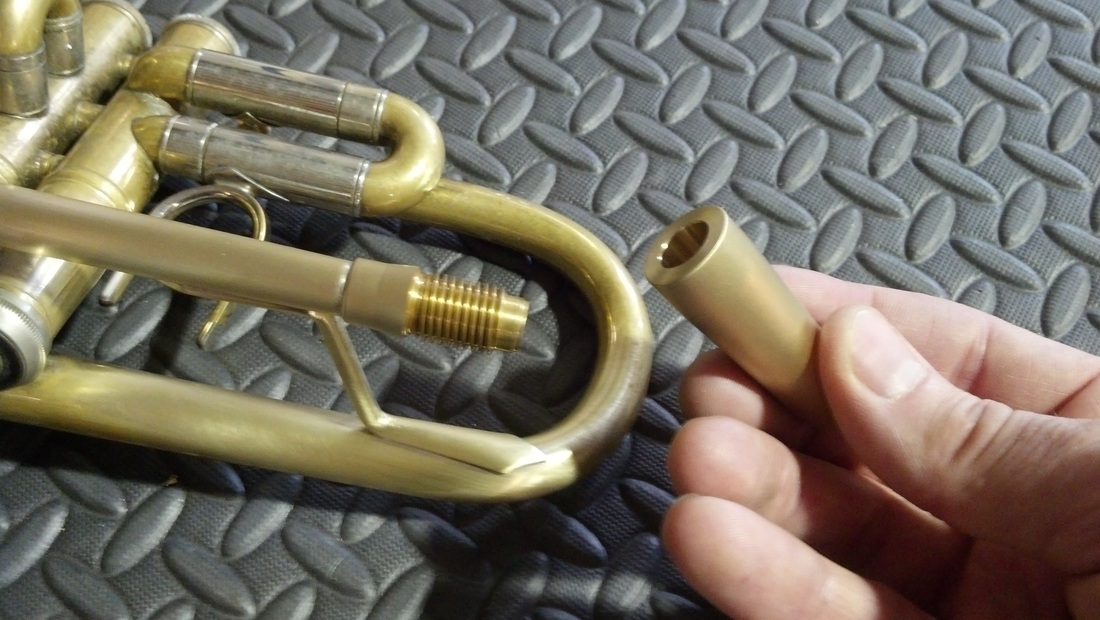
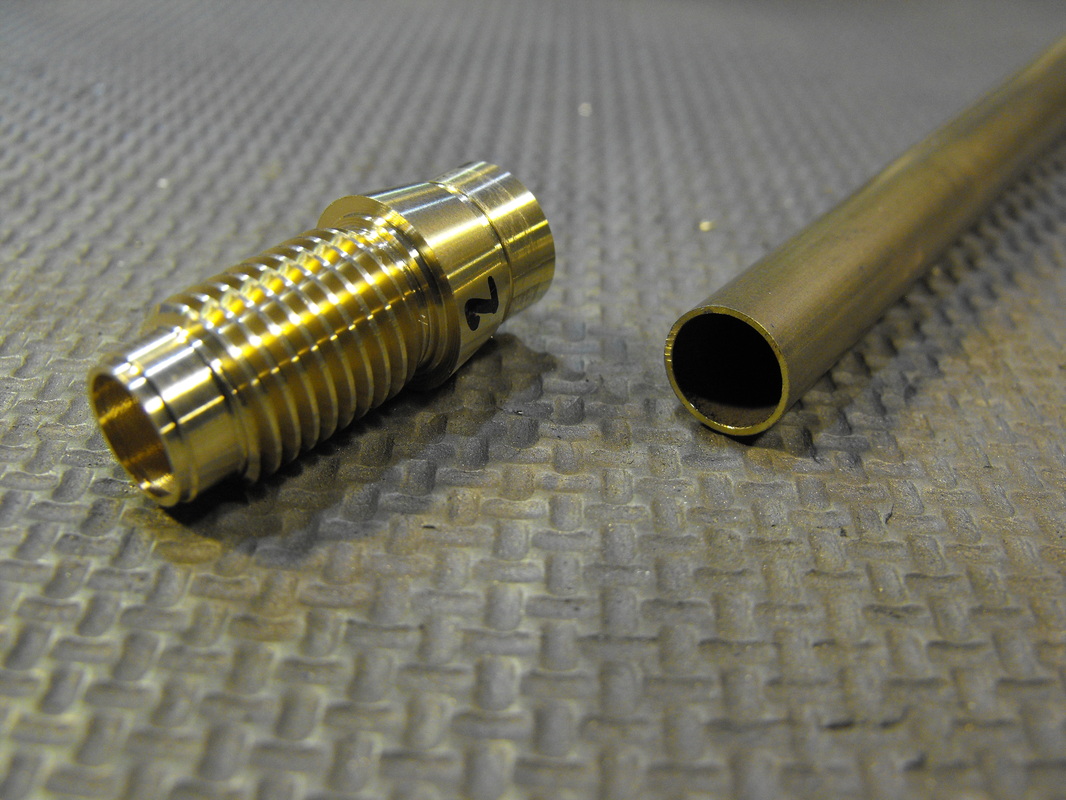
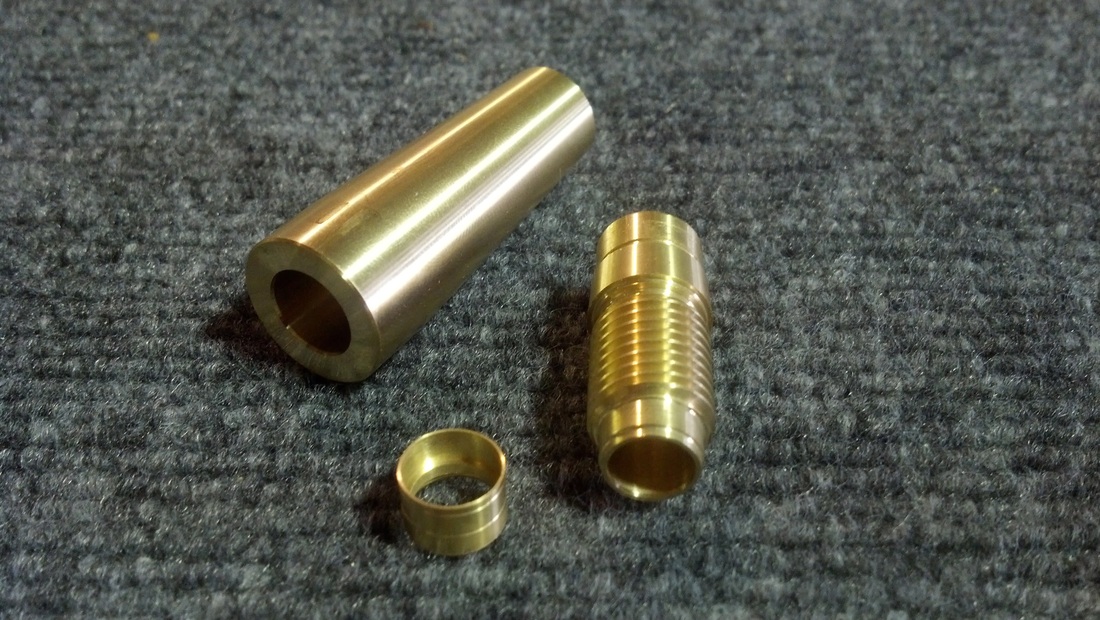
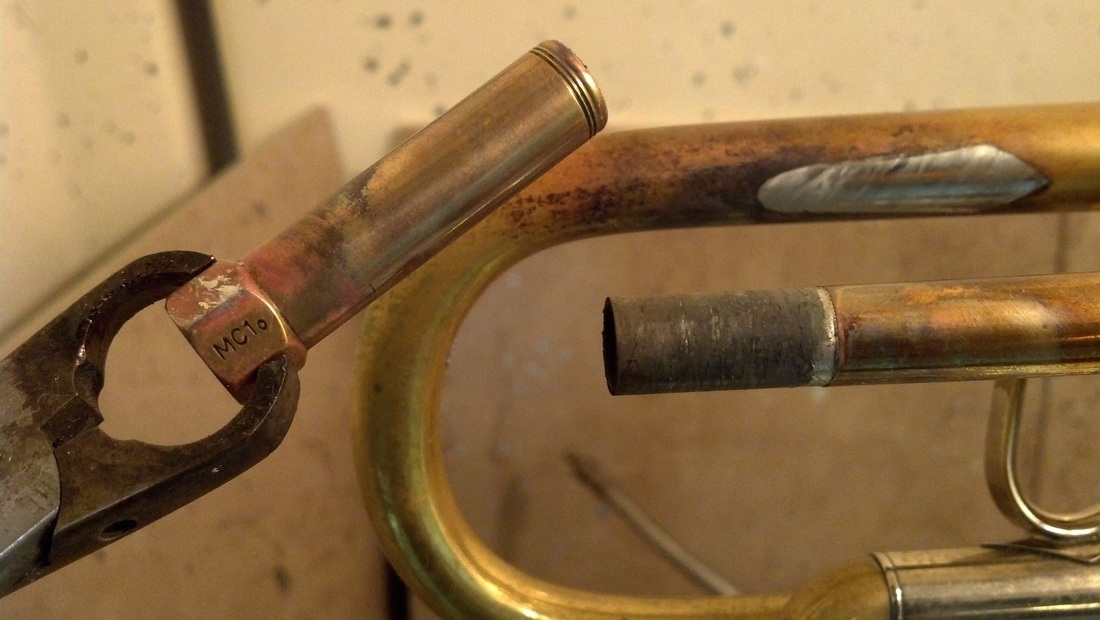 2) Carefully heat from under the receiver and brace with a medium flame and remove with a twisting motion. This receiver had almost no solder holding it together!  3) Sand the outside diameter of the leadpipe end to fit the AGR Mount. Insert a Sharpie pen into the leadpipe to keep the shop roll sand paper from slipping off of the end while sanding. 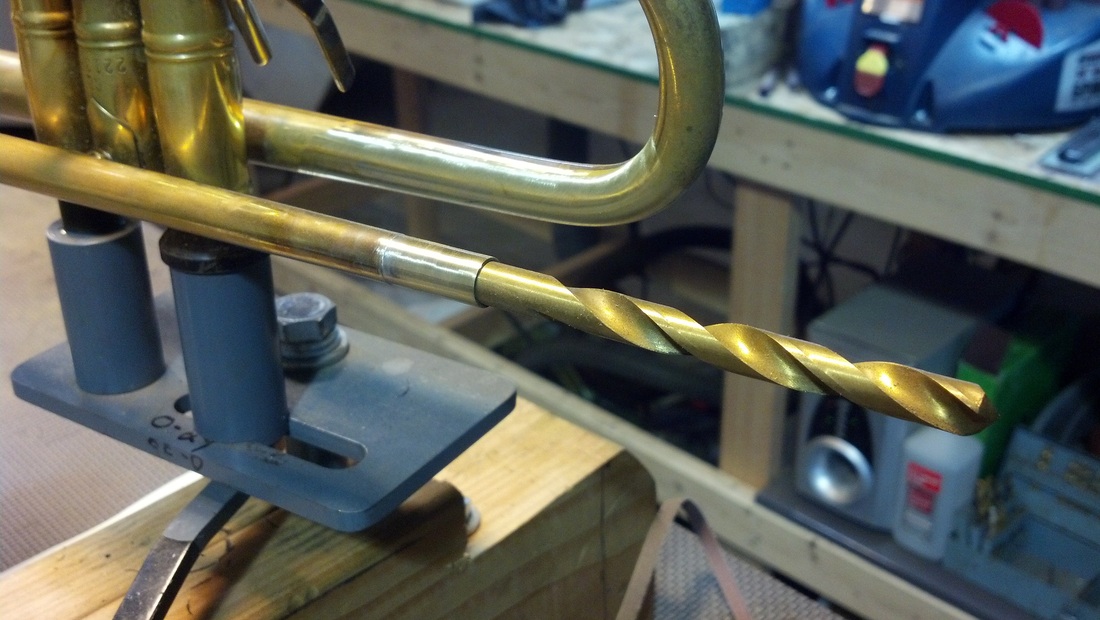 4) Or you could use a drill bit sized close to the venturi. 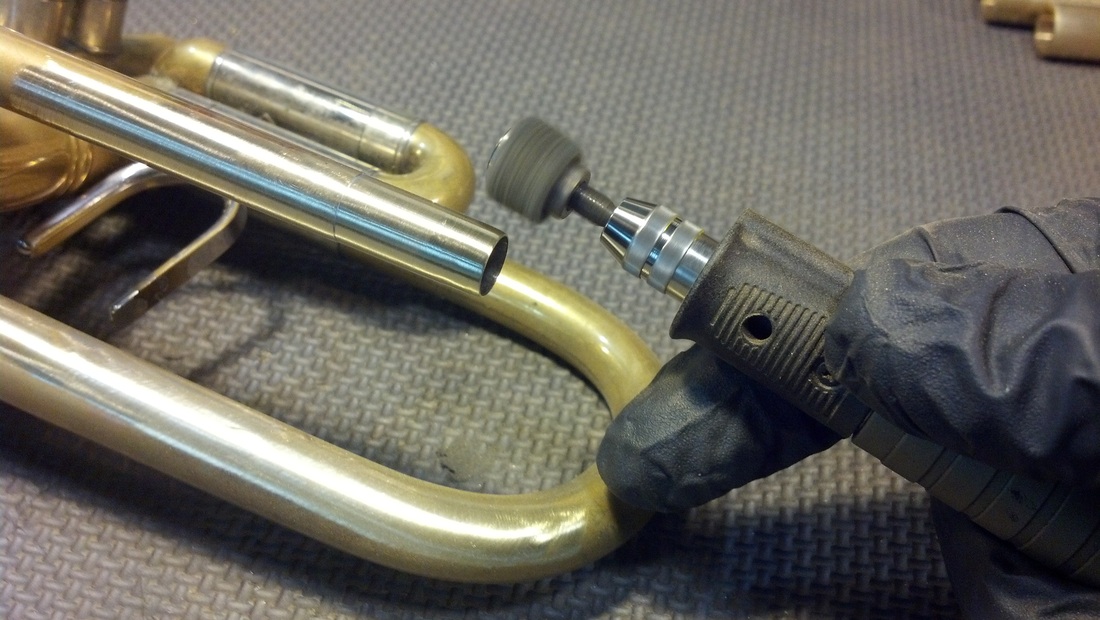 5) In cases where a lot of material must be removed, as with this Malone leadpipe that is very thick, a rotary tool with a 3M soft abrasive wheel will speed up the process. 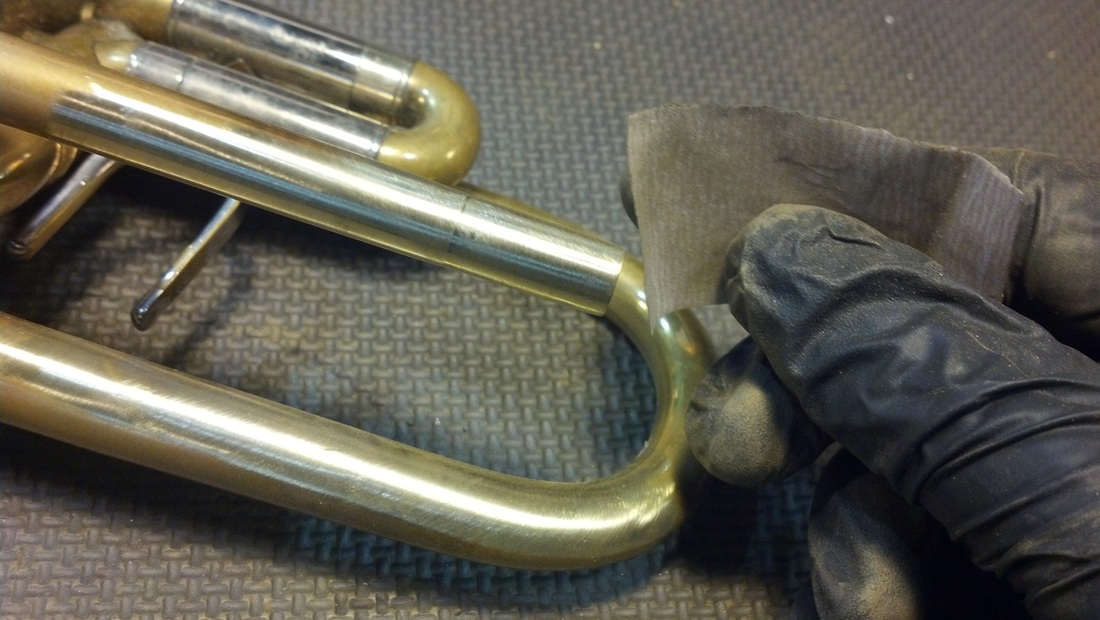 6) After using a rotary tool for roughing, it is important to finish sanding by hand with 400 grit paper. Do not use grit with a lower number. 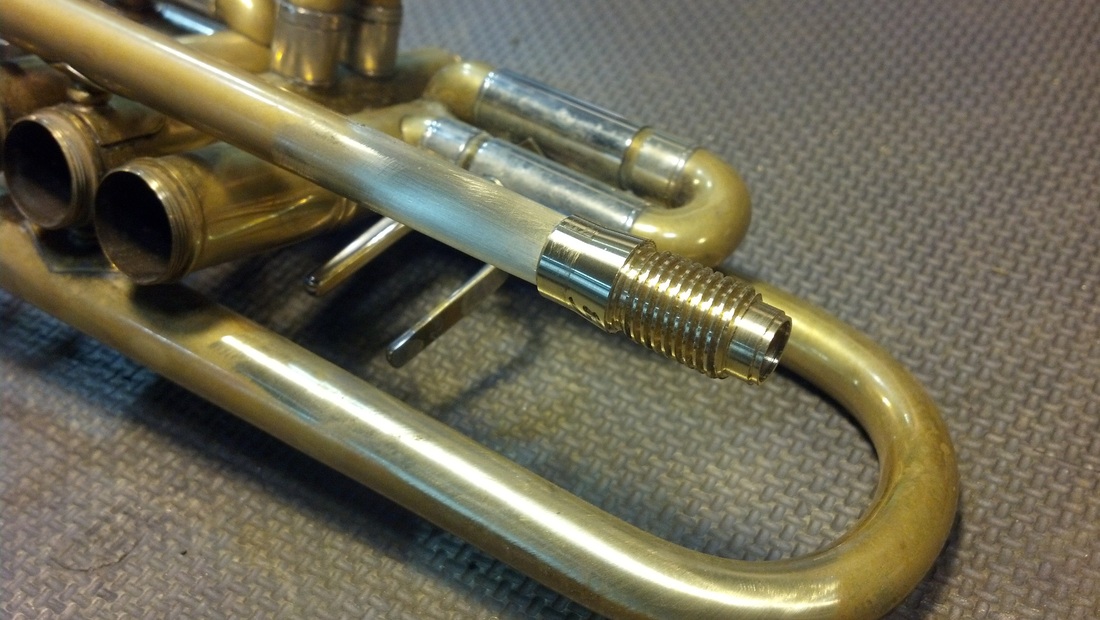 7) Fit the Mount to the receiver every so often to check your progress. The leadpipe should eventually touch the inside edge of the Mount as you remove material. 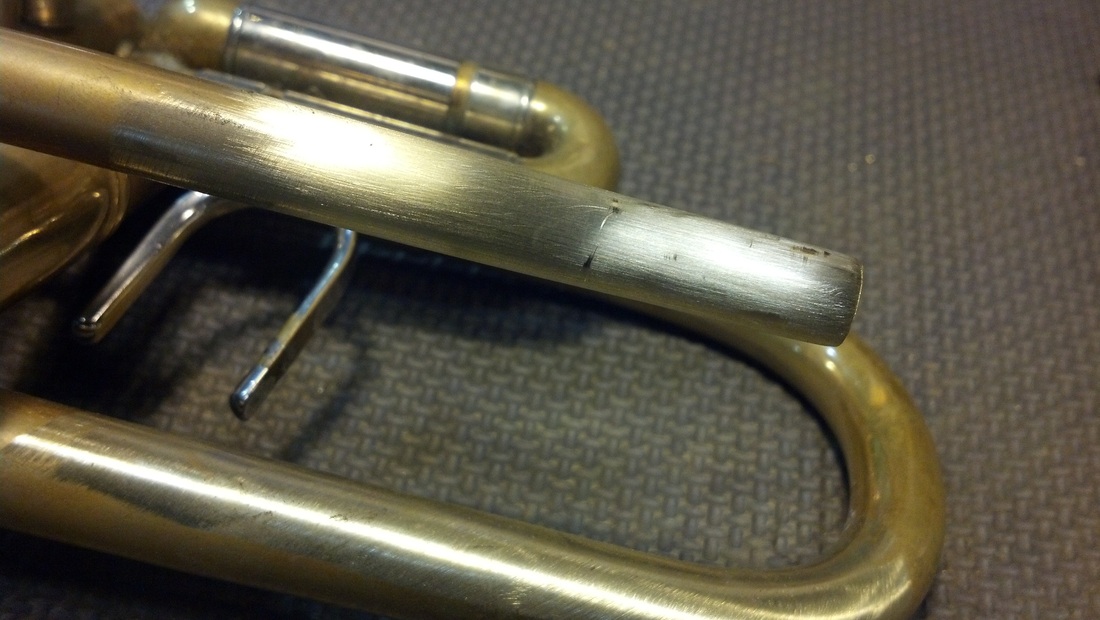 8) Burnishing marks left on leadpipe after test fitting the Mount show you where to finish sanding. 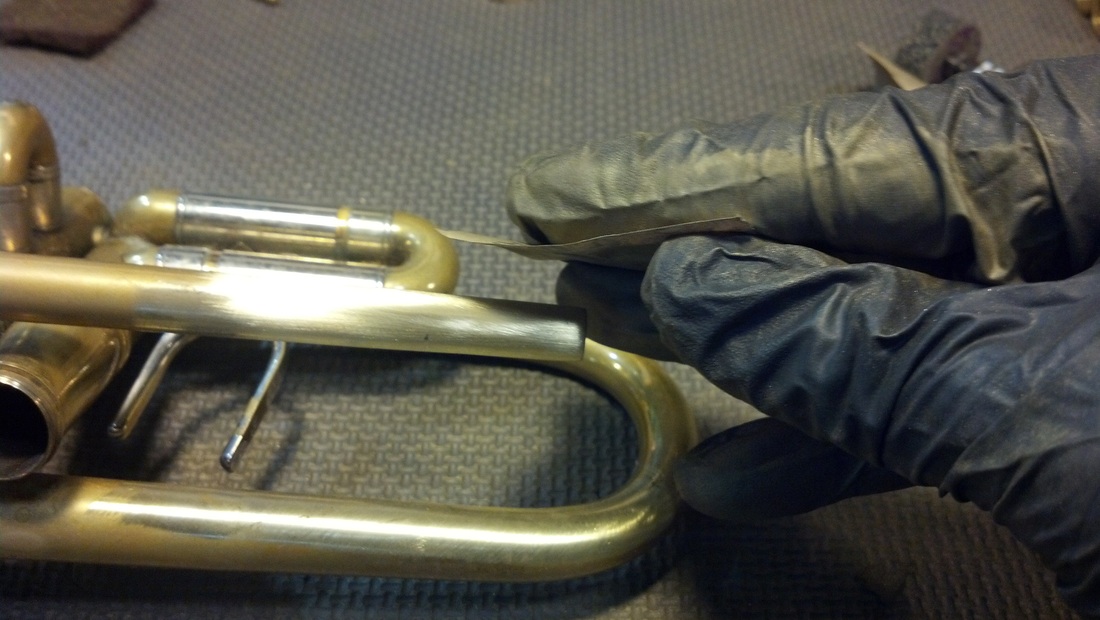 9) Take your time doing this step correctly moving quickly and relatively lightly. My Dad always says, "let the sandpaper do the work!" so there's no need to press hard. Repetitions are key to sanding quickly. 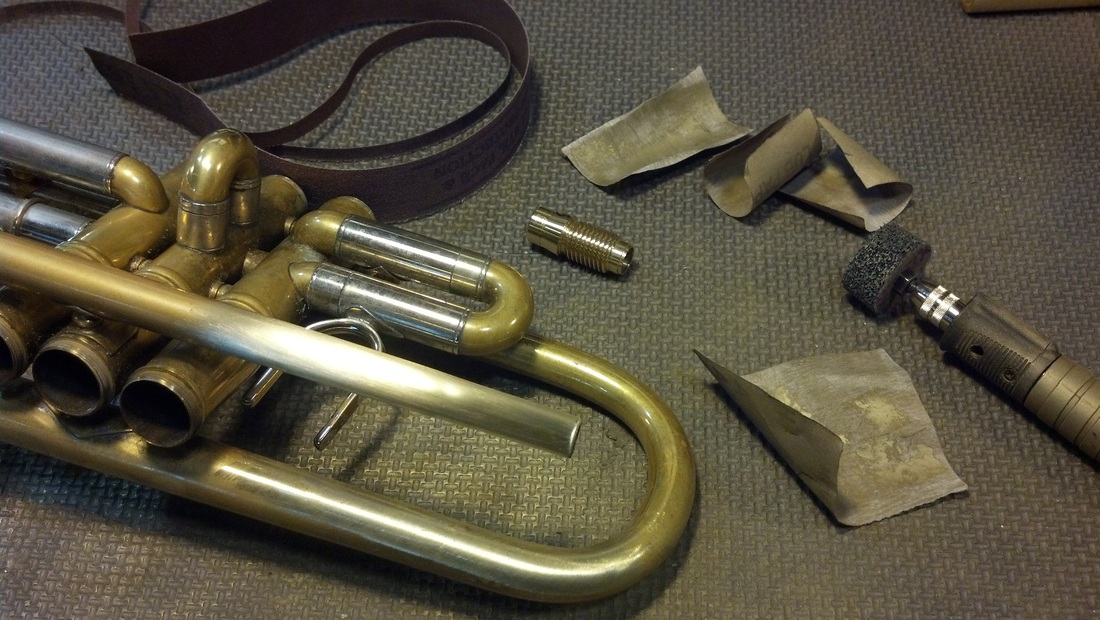 10) Leadpipe prepared for Mount installation. 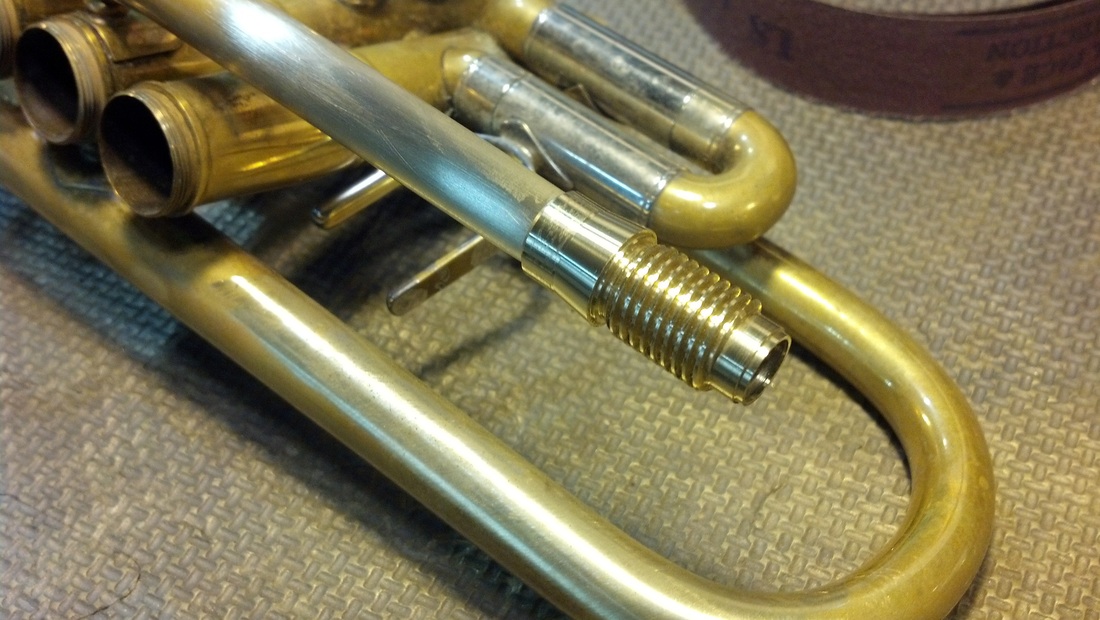 11) The Mount fits almost perfect. The next steps include fluxing all parts and screwing the receiver over the mount and lightly tap into final position.  12) Flux the leadpipe and receiver in preparation for final fit and soldering.  13) I couldn't show the previous step as I only have two hands! I screwed the Receiver onto the Mount and carefully tapped the Mount into place with a rawhide mallet. I recommend doing this with a small piece of wood between the mallet and the Receiver so you don't damage the Receiver, brass deforms easily! Now the Mount and leadpipe meet inside, ready for next step. 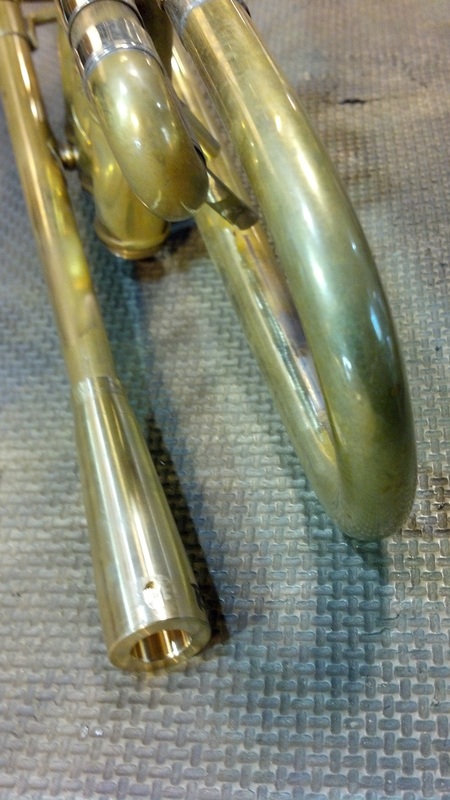 14) After ensuring that the Mount meets the end of the leadpipe (you should have unscrewed it to check), position the small slot on the bottom side of the horn so it is not visible when playing. 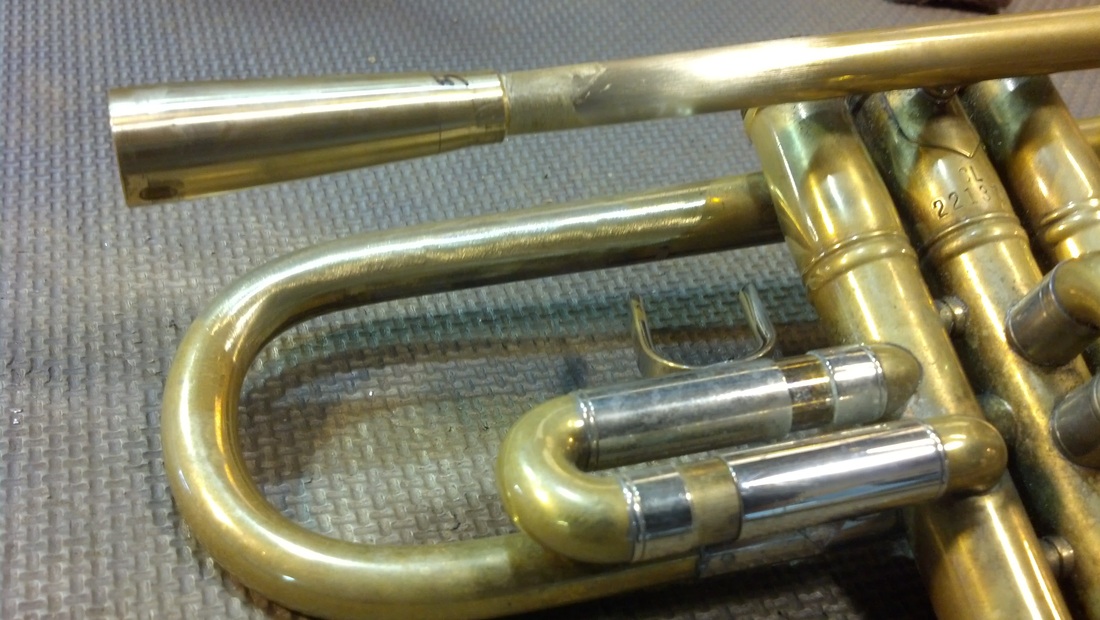 15) Looks good, the Receiver is positioned properly. 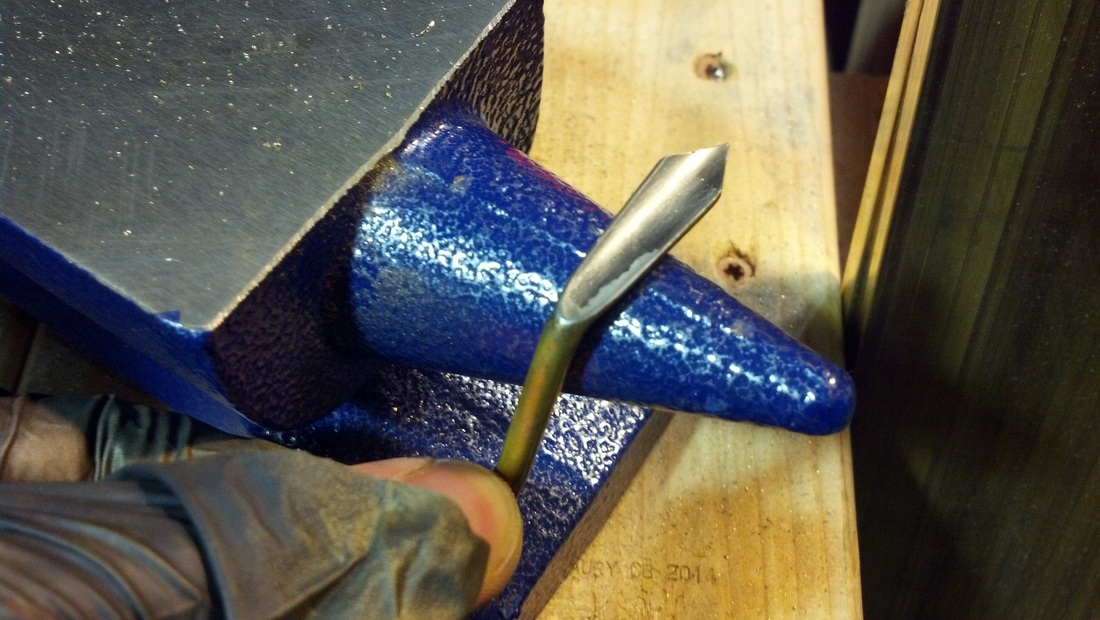 16) I recommend installing the original "S" brace backwards. I work on the anvil carefully tapping the brace to re-shape it to fit in the new position. 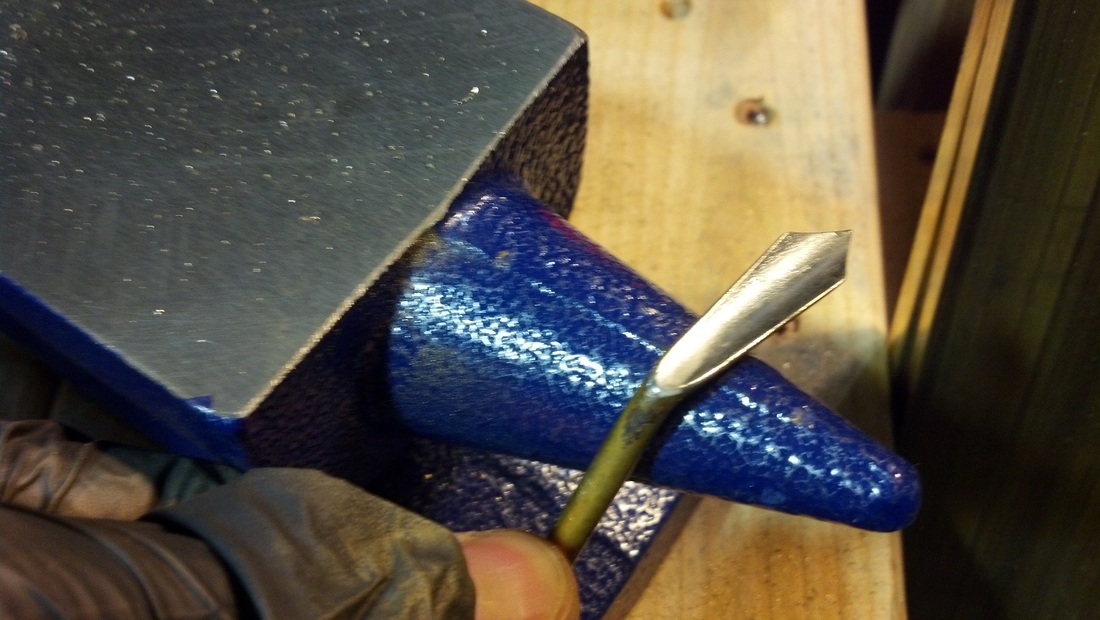 17) It will be necessary to change the angles of both sides. I go so far as to shape the end of the brace to nicely wrap around part of the bell crook. 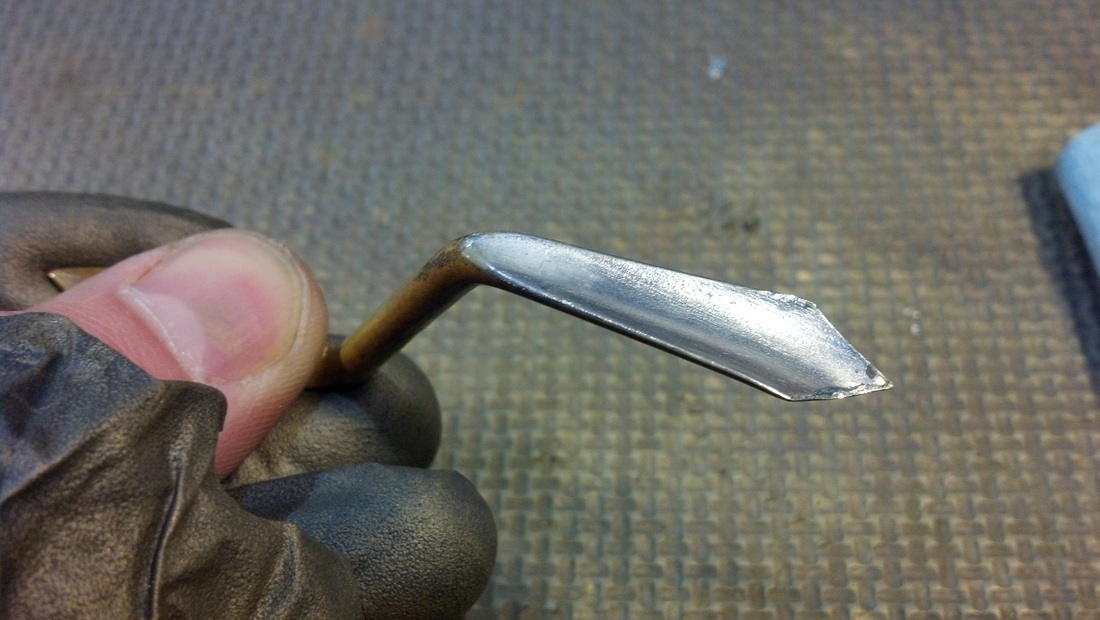 18) Notice the far right side of the brace is shaped to fit around the bell crook. Now we must remove the original solder. 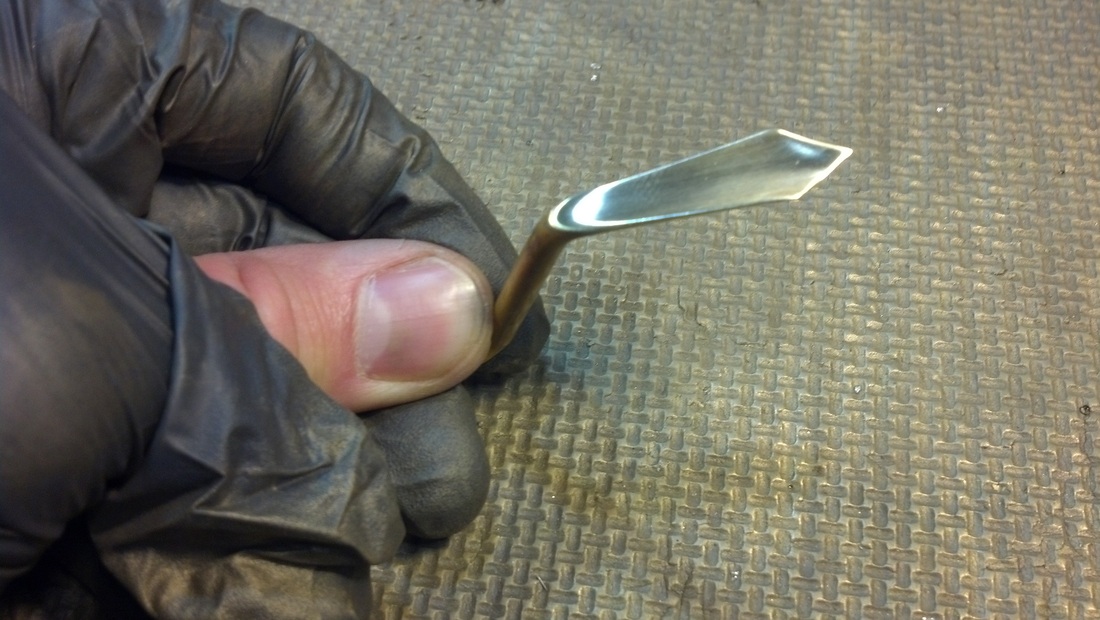 19) I removed the solder with a soft grinding wheel. You may use 400 grit sand paper to do this in a few minutes. Leaving the original solder will cause major issues in most cases so take time now to do this step with care.  20) Flux all mating surfaces of the brace. 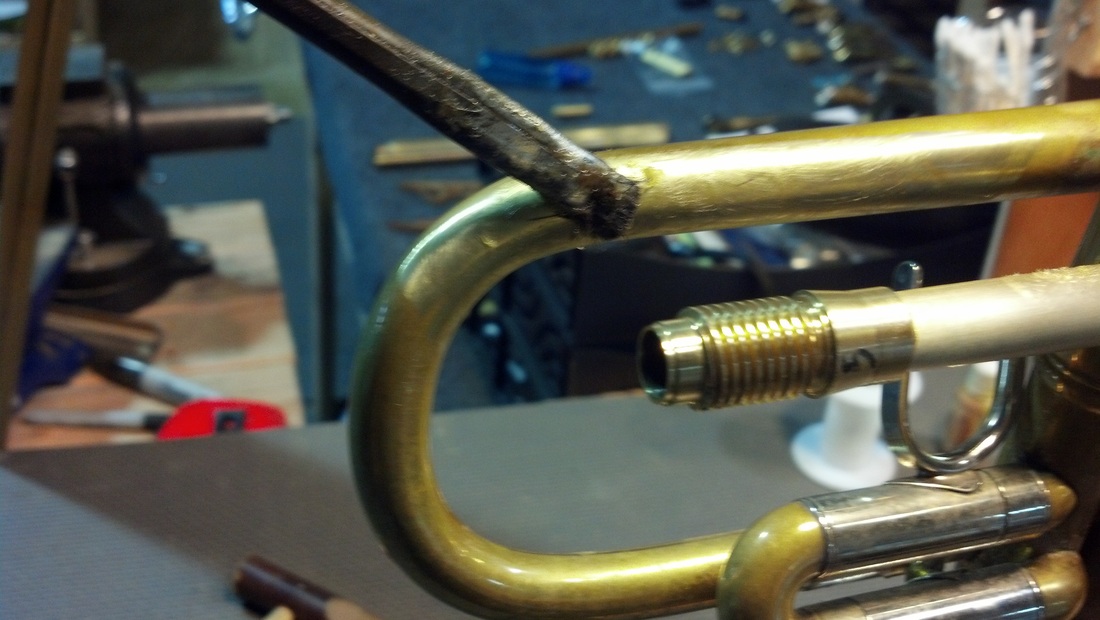 21) Remove all remaining solder from the original brace installation with 400 grit shop roll. Scrap thick layers of solder with a sharp brass scraper if necessary. Do not scrape with materials harder than brass such as steel. Flux all mating surfaces of the leadpipe and bell. 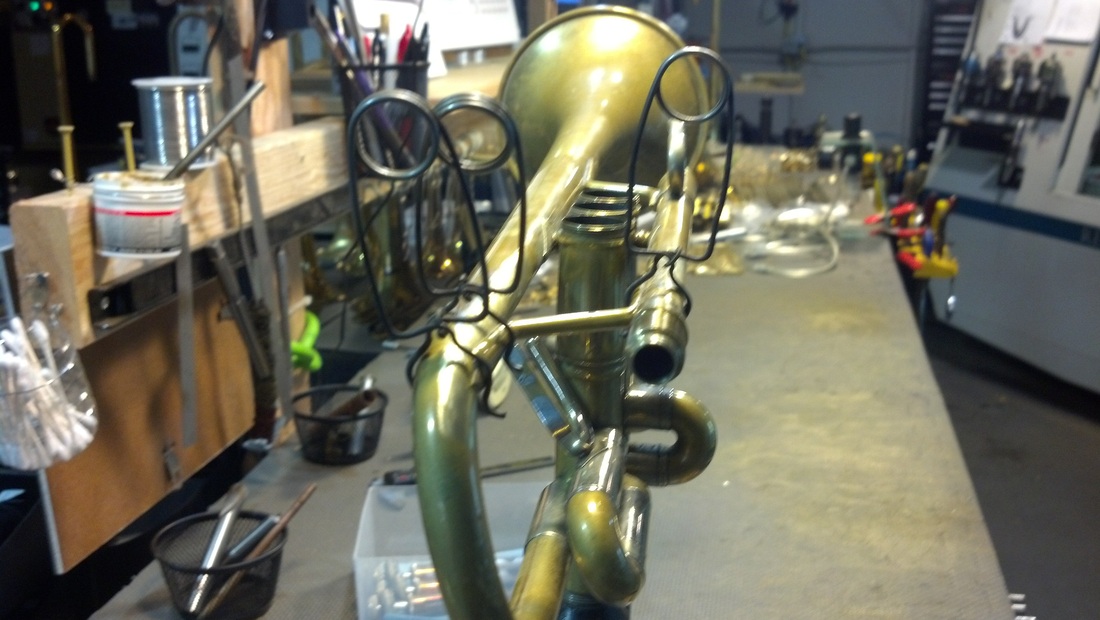 22) Clamp the brace in place after carefully positioning it as far back as possible. I leave around 1/8" of space between the Mount and brace for easier clean up later. 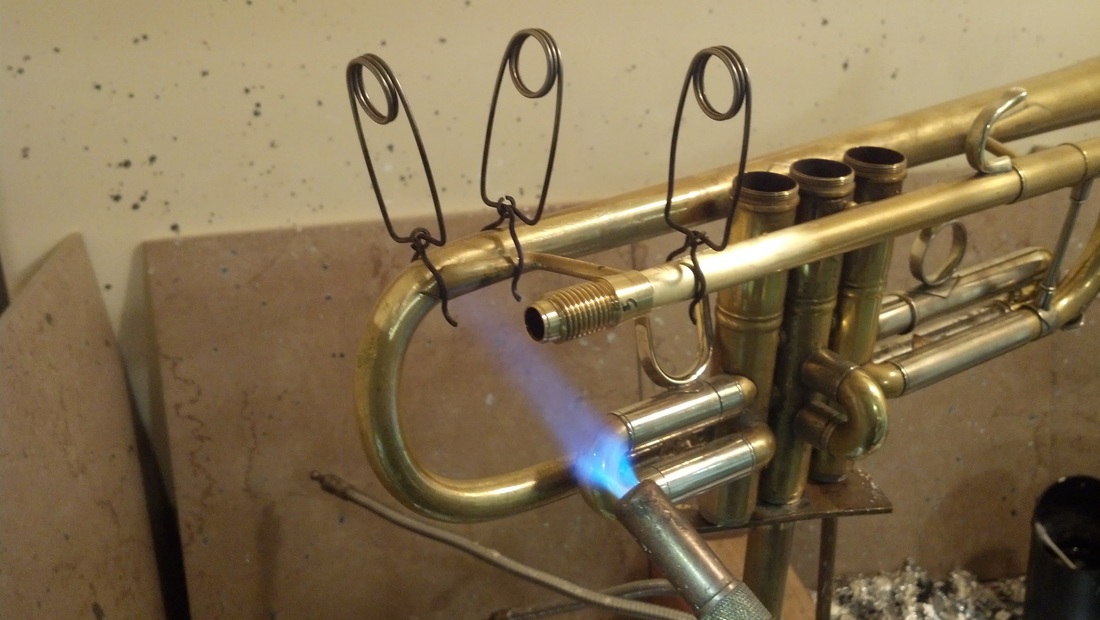 23) I recommend using 60/40 or 70/30 solder for this installation. Always heat from below the joint to be soldered. Take time to heat all parts evenly and only add solder after you see a small plume of smoke, which is a sign that the parts have reached the proper temperature. Do not overheat or you will need to start over from the beginning!  24) Gently tap solder directly at the joints. Feed a bit, look carefully, re-heat lightly and repeat until your joints are completely soldered. Dab a tiny bit of solder where the Mount and leadpipe meet. Use extra flux with a brush if the solder is not sticking immediately. See my videos for more tips.  25) While the assembly is still hot, wipe excess solder from joints with a cotton swab or cotton cloth. Carefully swab the inside of the leadpipe/Mount clean. Be careful not to burn yourself. 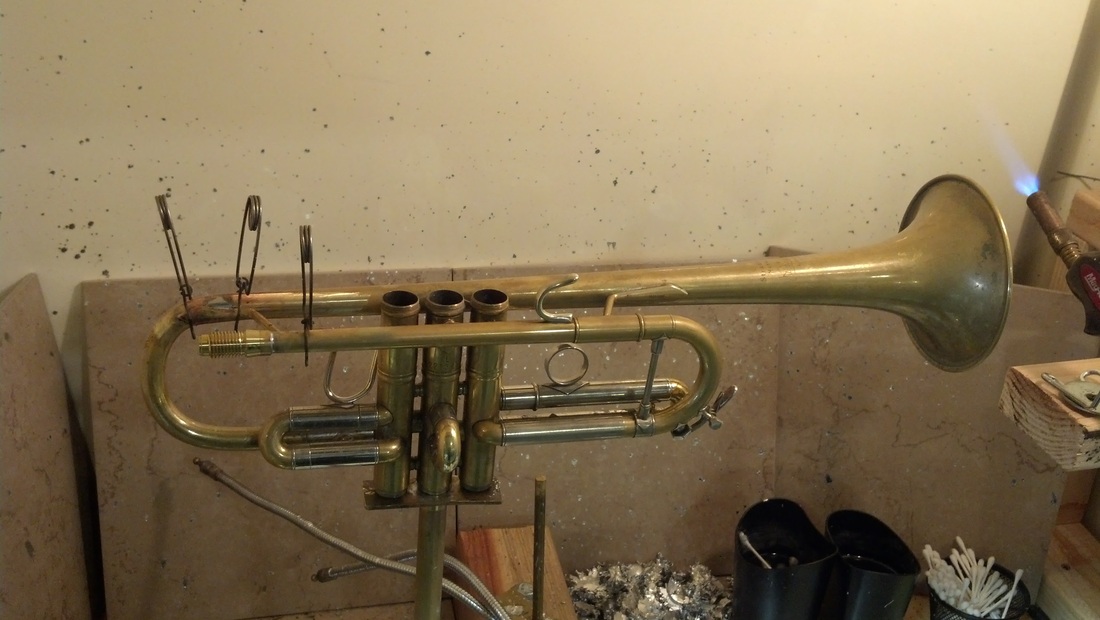 26) Let the horn cool for five or more minutes before handling. I know you're excited at this stage, but cooling artificially with water or a wet rag will weaken or even break the solder joints. Snap a photo and post it to Facebook to pass the time. 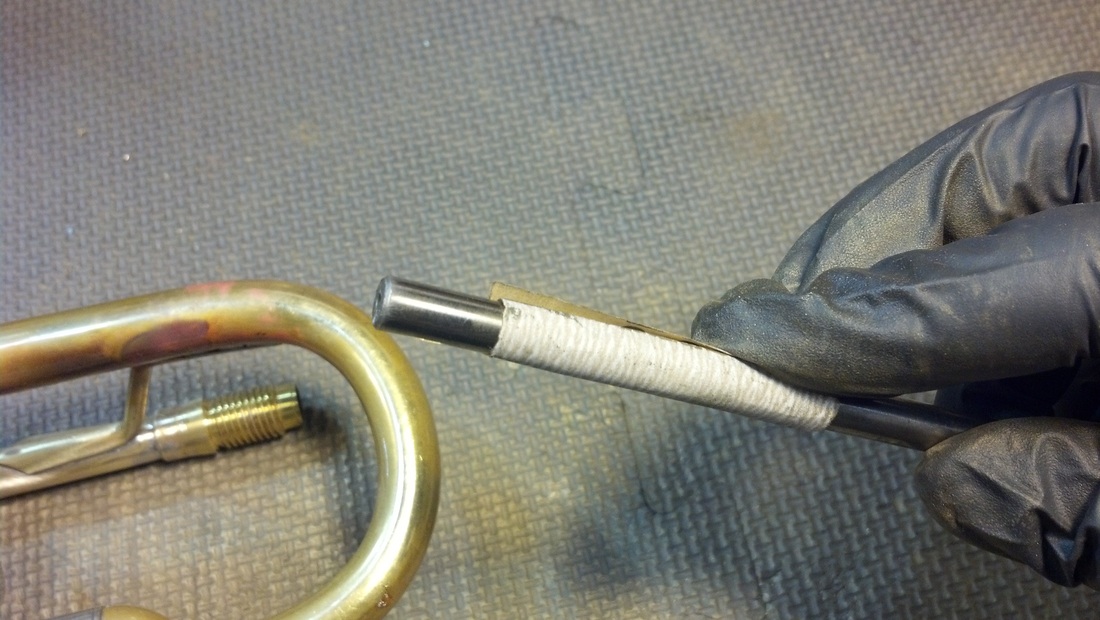 27) Use the shank of a drill bit or a wooden dowel and some 400 grit sand paper to clean out the inside of the Mount and leadpipe.  28) Lightly sand the inside until you have a perfectly clean smooth surface. Don't worry about opening up the venturi a few thousandths on this step, the AGR will correct for this which is why you are installing it today! 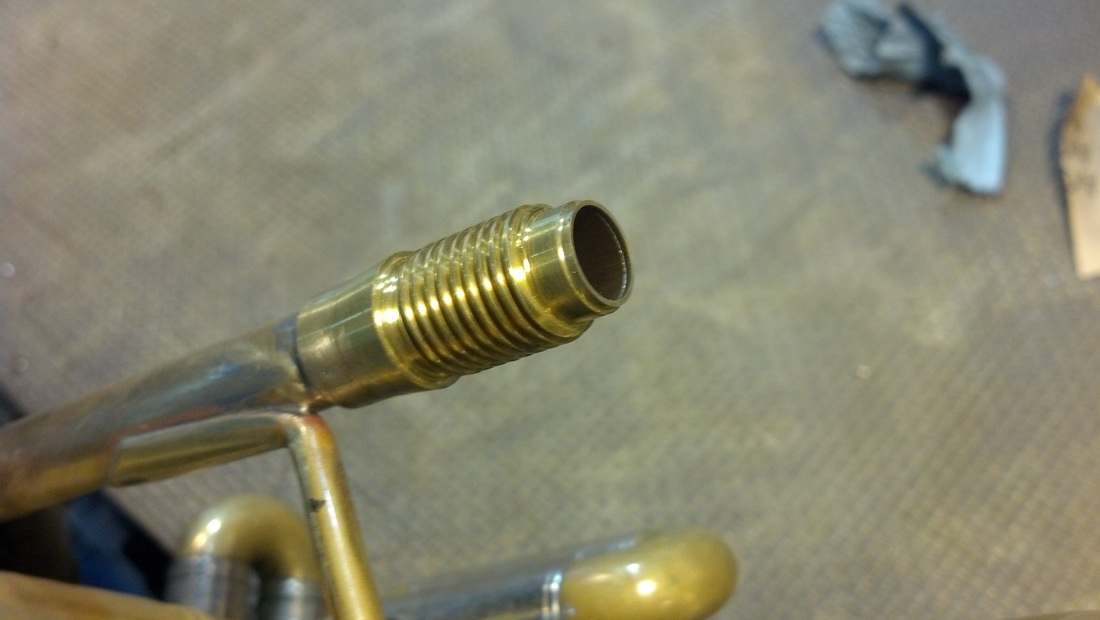 29) Nice clean smooth surface inside the Mount and leadpipe.  30) Now for the cleanup, use 400 grit sand paper to clean up all rough spots and to smooth the transition from the Mount to the Receiver. When I sand new trumpets in the Harrelson Shop, I am careful to sand so that you cannot find the seam between the two until you unscrew the Receiver. This looks very professional and will surprise your friends!  31) I didn't show the scraping step as I only have two hands, but I make all of my own scrapers from scrap brass sharpened on a disc sander. You can see one of my homemade scrapers at the top right of this photo. I carefully scraped off all solder from the joints before final finishing with this small maroon 3M Scotchbrite pad.  32) Notice the details and take your time finishing. I have been doing this kind of work for twenty years so don't expect this to be easy. A good job will look amazing, but it will also take time.  33) Carefully inspect and touch up any remaining solder or rough areas. Notice how the brace slightly wraps around the bell crook on the far left? 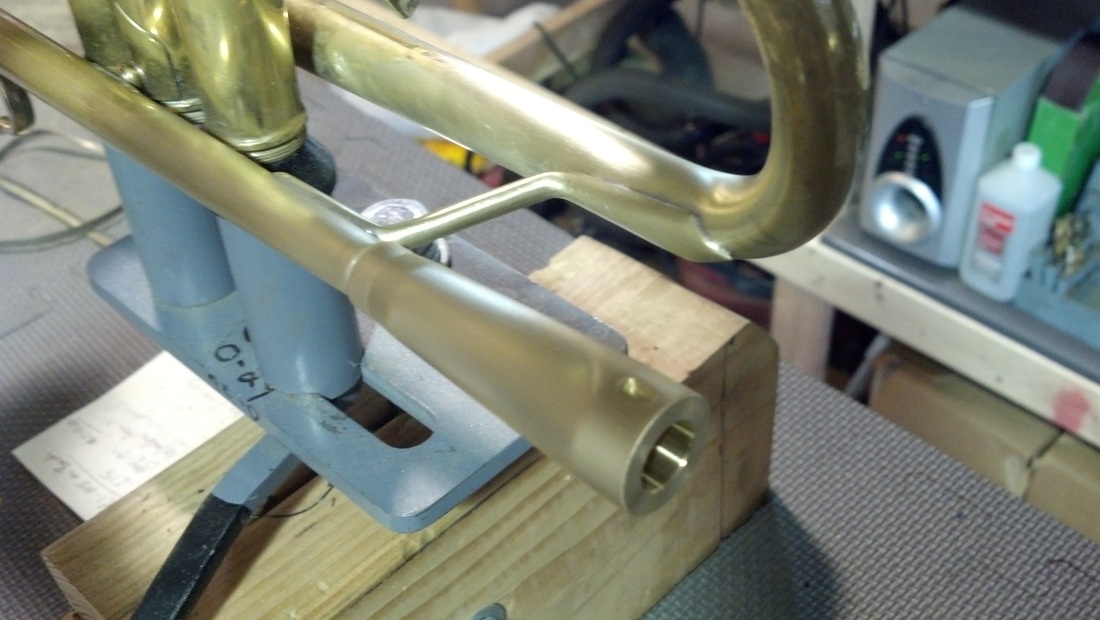 34) Inspect the bottom even though you may be the only one who ever sees this area.  35) Now unscrew the Receiver a bit to take pride in a job well done. 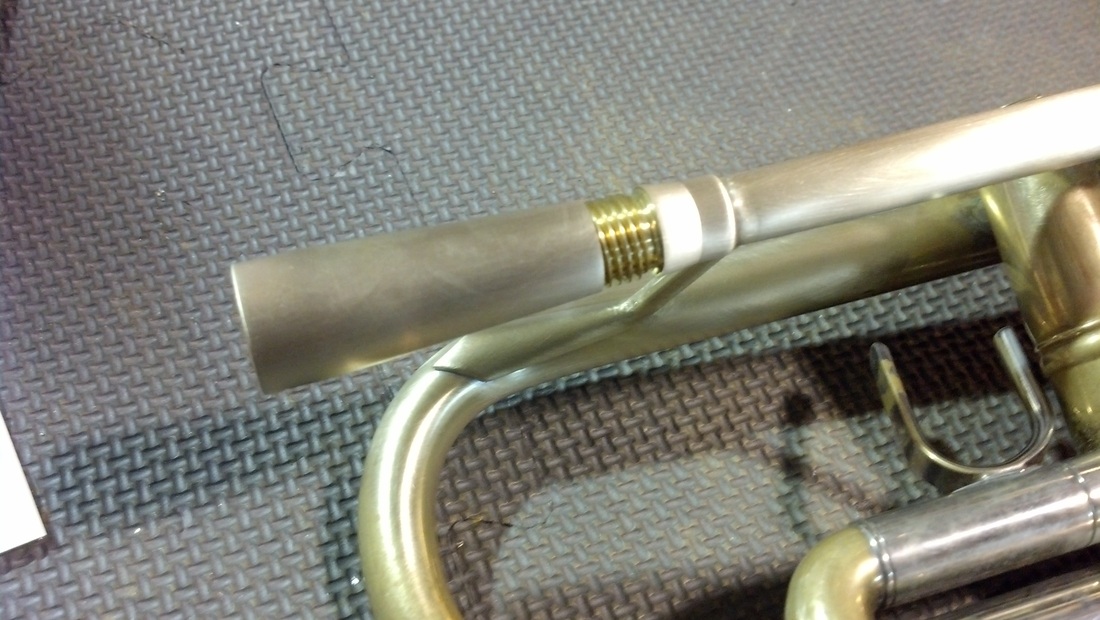 36) Looking good...  37) Prepare the horn for re-assembly by blowing off everything with compressed air. Use safety glasses! Now swab out the valve casings and wipe down the pistons before installation. One small piece of sand from your sand paper or 3M pad could seize your valves! Take time to swab out the leadpipe and bell as dust can get anywhere there is an opening. 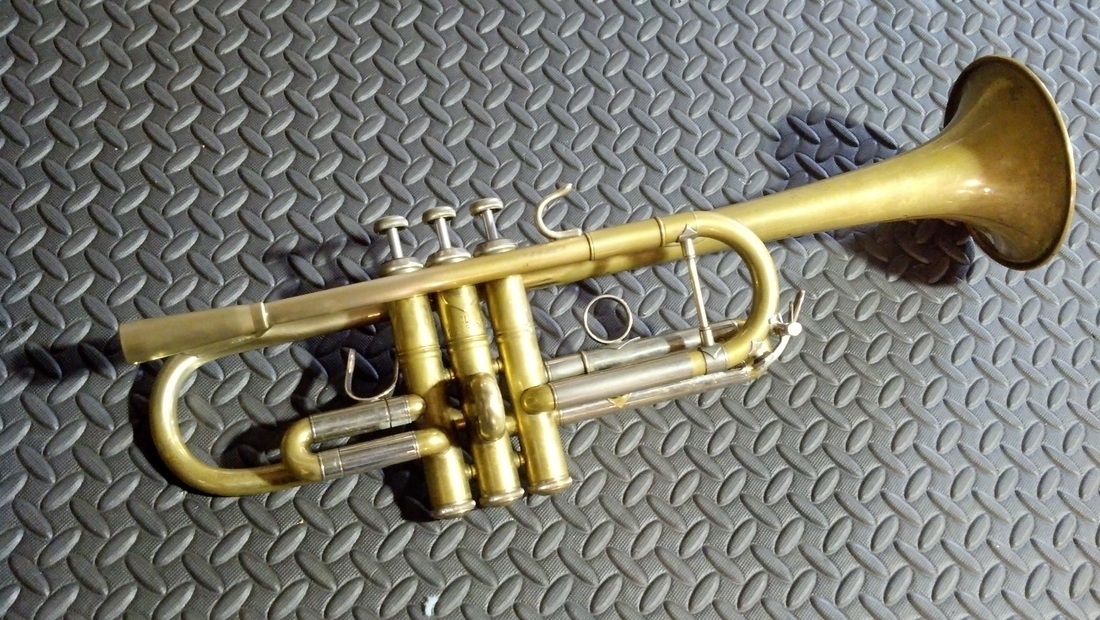 38) Finished AGR Installation on Bach C trumpet. Please share your photos and experiences with your own AGR!
8 Comments
Greg Zent
4/23/2014 02:30:58 am
Outstanding.
Greg Zent
4/23/2014 02:53:59 am
I would also add to step 37 that the leadpipe and tuning slide are cleaned out just in case something got in there.
Greg Zent
4/23/2014 03:17:50 am
not trying to be a pain (I know, I don't need to try, I just am :) but you might mention that you cleaned the old solder off the bell from where the brace was before.
Jason
4/24/2014 03:38:03 am
Thanks Greg, I'll update the instructions with your suggestions!
Jason
2/6/2015 04:22:24 am
Yes, we offer professional installation or you can have most repair shops install it for you. 4/20/2016 06:49:34 am
I thought it was interesting to learn that, "Most installations require 3 to 4 hours by a novice and around 2 hours for experienced technicians with access to a repair shop." I don't know how to play the trumpet, and I definitely don't know how to put one together. However, my dad was a really good trumpet player so it's always been special to me. I thought I should try to learn more about it. Thanks for the explanation!
JARED HUNT KINDER
10/7/2020 03:01:45 pm
Do you use Butane, Propane or MAPP gas? Your comment will be posted after it is approved.
Leave a Reply. |
 Jason Harrelson
Inventor, Musician, Educator and Founder of Harrelson Trumpets, Trumpet Momentum and Harrelson Momentum. Archives
July 2024
|
 RSS Feed